Last Tuesday, I stood in my kitchen at 7 PM, staring at the frost covering my windows like a spider web. The heating bill was already making me wince, but stepping outside to grab takeout felt like volunteering for hypothermia. That’s when I spotted the block of raclette cheese sitting in my fridge, left over from a weekend gathering that never happened.

What started as a “let’s see what happens” moment turned into the most satisfying fifteen minutes of my week. No fancy equipment, no complicated prep work—just me, a cast-iron skillet, and four simple ingredients that transformed into something that tasted like a warm hug from the Alps.
This skillet raclette toastie has since become my go-to solution for those bone-chilling evenings when comfort food isn’t just a craving—it’s a necessity.

Why a Simple Skillet Beats Expensive Raclette Equipment
Traditional raclette requires a whole production. You need the special machine, the tiny spatulas, plates of accompaniments, and usually a group of people who don’t mind spending two hours around a table. It’s wonderful for entertaining, but completely impractical for a weeknight dinner.
The skillet raclette toastie strips away all that complexity while keeping the soul of what makes raclette special: that creamy, nutty cheese that stretches and melts into golden perfection. You get the same satisfying experience, but compressed into a handheld format that’s ready in minutes.

“The beauty of cooking raclette in a pan is that you get better control over the browning,” explains chef Marie Dubois, who runs a small bistro in the French Alps. “The bread crisps up while the cheese stays molten inside—it’s actually superior to the traditional method for a quick meal.”
The Four-Ingredient Formula That Never Fails
Simplicity is what makes this recipe so reliable. You don’t need to hunt down exotic ingredients or master complicated techniques. Here’s everything you need for two generous toasties:

| Ingredient | Amount | Why It Matters |
| Thick-cut bread | 4 slices | Holds structure under melted cheese |
| Raclette cheese | 4-6 slices | Provides authentic Alpine flavor |
| Cooked ham | 2 slices | Adds savory depth and protein |
| Dijon mustard | 1 tablespoon | Cuts through richness with acidity |
| Salted butter | 30g | Creates golden, crispy exterior |
The key is using thick bread that won’t collapse under the weight of melting cheese. Think farmhouse loaf or country-style bread—anything substantial enough to contain the molten center without falling apart.
Raclette cheese is non-negotiable here. Its unique texture and flavor can’t be replicated with cheddar or Swiss. When it melts, it stays creamy rather than turning stringy, which is exactly what you want for this application.

The 15-Minute Method That Guarantees Perfect Results
Start by laying your bread slices flat and spreading a thin layer of mustard on one side of each piece. Don’t skip this step—the mustard’s acidity prevents the finished toastie from feeling too rich or heavy.
Layer the raclette cheese generously on two slices, add the ham, then top with the remaining cheese. The cheese-ham-cheese sandwich creates better melting and prevents the ham from drying out.
Close the sandwiches and butter the outside surfaces thoroughly. This isn’t the time to be conservative with butter—it’s what creates that golden, crackling crust that makes the difference between a good toastie and an exceptional one.
Heat your skillet over medium-low heat. Too hot, and the bread burns before the cheese melts. Too cool, and you’ll end up with pale, soggy results.
“The trick is patience,” notes food writer James Morrison, who specializes in European comfort foods. “Let the heat do the work slowly. You’ll hear the butter sizzling and see the edges starting to turn golden—that’s your cue that everything’s working perfectly.”
Cook for about 3-4 minutes on the first side, pressing gently with a spatula to help everything meld together. Flip carefully—the cheese will be molten by now—and cook another 3-4 minutes until both sides are deeply golden.
What Makes This Different from Regular Grilled Cheese
This isn’t your typical American grilled cheese sandwich. The raclette cheese behaves completely differently when heated, staying creamy and stretchy rather than turning into the slightly rubbery texture you get with processed cheese.
The addition of mustard and ham transforms the flavor profile entirely. Instead of simple, one-note comfort food, you get layers of taste: the nuttiness of the raclette, the smokiness of the ham, the sharp tang of mustard, all wrapped in buttery, crispy bread.
The cooking method also differs. Rather than high heat for quick browning, the lower temperature allows the cheese to melt completely while the bread develops a deep, even crust.
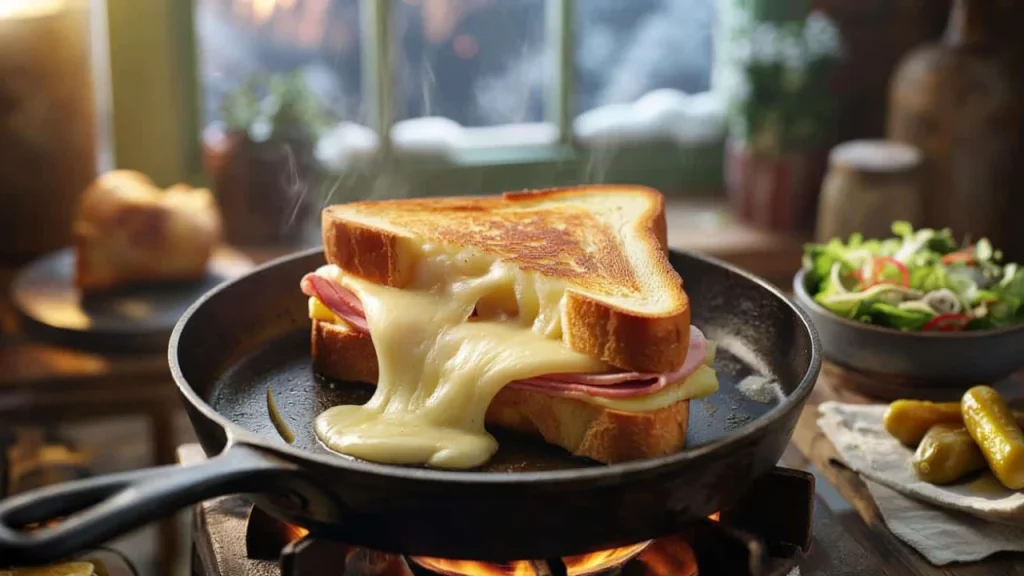
“When you cut into a properly made raclette toastie, the cheese should ooze out slightly,” explains culinary instructor Sarah Chen. “That visual cue tells you the temperature was perfect and the timing was right.”
Perfect Pairings and Serving Suggestions
Serve your skillet raclette toastie immediately while the cheese is still molten. A simple green salad with vinaigrette provides a bright contrast to the rich sandwich, or you can go traditional with cornichons (small French pickles) on the side.
A glass of dry white wine or light beer complements the flavors perfectly, though a cup of hot tea works just as well on particularly cold evenings.
Cut the toastie diagonally for the best presentation—you want to show off that melted cheese center that you worked so carefully to achieve.
FAQs
Can I make this without raclette cheese?
Gruyère or Emmental can substitute, but the texture and flavor won’t be quite the same as traditional raclette.
What if I don’t have a cast-iron skillet?
Any heavy-bottomed pan works well—the key is even heat distribution to prevent burning.
Can I prepare these ahead of time?
The toasties are best made fresh, but you can assemble them up to 2 hours ahead and keep covered in the refrigerator.
How do I prevent the cheese from leaking out?
Don’t overfill the sandwich, and make sure to seal the edges by pressing gently with your spatula while cooking.
Can I add other ingredients?
Thinly sliced onions or a few leaves of fresh thyme work beautifully, but keep additions minimal to maintain the simple elegance.
What’s the best bread thickness?
Aim for slices about 3/4 inch thick—substantial enough to hold the filling but not so thick that the outside burns before the inside heats through.