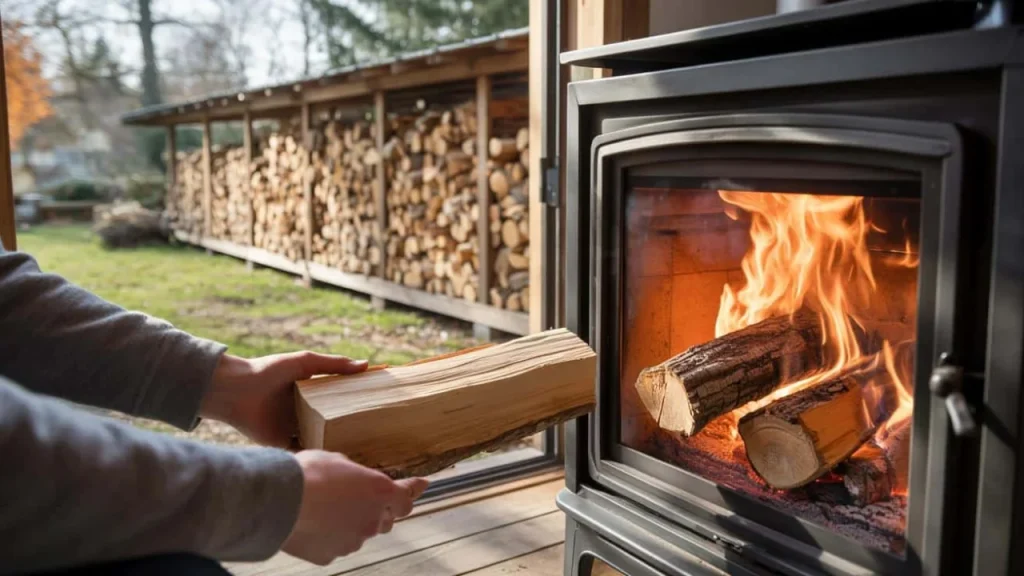
Marie sat staring at her wood stove last Tuesday evening, frustrated and cold. Despite burning through half her winter log supply in just two months, her living room barely felt warm. The flames looked weak, smoke kept backing up into the room, and her heating bills were still climbing because she had to run the backup heater constantly.

Then her neighbor Jacques mentioned something that changed everything. “I’ve been doing it since this week and I saw a real difference,” he told her over the fence. He wasn’t talking about buying expensive seasoned wood or upgrading his stove. He was talking about a simple log preparation technique that had doubled the heat output from the same firewood.
Marie tried it immediately. Within days, her flames burned brighter, her room stayed warmer longer, and she was using half as much wood. The difference was so dramatic that she started telling everyone who would listen.
Why Your Firewood Might Be Working Against You
Across Europe, millions of households have turned to wood heating as energy costs soar. But most people are unknowingly throwing money up the chimney because they don’t understand how moisture content affects burning efficiency.
When you toss a log into your stove, you’re not just burning wood—you’re also burning the water trapped inside. Freshly cut wood typically contains 40-60% moisture by weight. Before that log can start heating your home, your fire has to work overtime just boiling off all that water as steam.
“Most homeowners think wood is ready if it looks dry on the outside,” explains heating engineer David Thomson. “But the moisture hidden inside those logs is stealing half your heat before you even notice.”
The energy wasted on evaporating water means you need twice as much fuel to achieve the same room temperature. Worse yet, wet wood burns cooler, creates more creosote buildup in your chimney, and produces significantly more harmful emissions.

The Game-Changing Log Preparation Technique
The method that’s revolutionizing wood burning efficiency isn’t about expensive equipment or special additives. It’s about dramatically improving how quickly your logs dry and how completely they burn.
Here’s the step-by-step process that users say doubles their heat output:

- Split immediately: Cut logs to 30-40 cm lengths and split them into halves or quarters within days of delivery
- Maximize surface area: Smaller pieces mean more exposed wood fibers for moisture to escape
- Stack with gaps: Create 2-3 cm spaces between each piece for airflow
- Cover only the top: Protect from rain while allowing sides to breathe
- Elevate off ground: Use pallets or rails to prevent moisture absorption from below
- Face south when possible: Take advantage of sun exposure for faster drying
“The difference is night and day,” says heating specialist Anna Rodriguez. “Properly prepared wood can drop from 45% moisture to 15% in just 4-6 months instead of the usual 12-18 months.”
| Wood Preparation Method | Moisture Content | Heat Output | Drying Time |
|---|---|---|---|
| Traditional stacking | 35-45% | Standard | 12-18 months |
| Improved technique | 15-20% | Nearly double | 4-6 months |
| Kiln-dried (commercial) | 10-15% | Maximum | Immediate use |
What Happens When You Get It Right
Users of this enhanced log preparation technique report remarkable improvements within just weeks of implementation. The changes affect not just heat output, but the entire burning experience.
Properly dried wood ignites faster and burns with those satisfying, dancing flames you see in fireplace commercials. The fire maintains consistent temperature longer, meaning fewer trips to reload. Smoke production drops dramatically, and that acrid smell that sometimes fills the room virtually disappears.
“I was skeptical at first, but after splitting my last cord this new way, I’m using 40% less wood for the same warmth,” reports homeowner Chris Manning. “My chimney sweep even noticed less creosote buildup during the last cleaning.”
The financial impact adds up quickly. If you typically burn through €800 worth of wood per season, this technique could save you €300-400 annually. For households burning multiple cords, the savings become even more substantial.
Beyond personal benefits, proper wood preparation significantly reduces air pollution. Wet wood produces up to ten times more particulate emissions than properly dried logs, so this technique helps your entire neighborhood breathe easier.
Common Mistakes That Kill Efficiency
Even with good intentions, several common errors can sabotage your log preparation efforts. Many people make the mistake of covering their entire wood pile with plastic sheeting, which traps moisture instead of allowing it to escape.
Another frequent error is stacking logs too tightly together. While this might look neater, it prevents proper air circulation and can actually increase drying time by months.
“I see people storing wood in their basement thinking it’s ‘dry’ down there,” notes chimney specialist Robert Chen. “But basements are often humid, which means your wood is actually absorbing moisture instead of losing it.”
The timing of when you split also matters enormously. Wood split in spring dries much faster than wood split in fall, giving you a full summer of drying time before the heating season begins.
FAQs
How can I tell if my wood is dry enough to burn efficiently?
The best method is using a moisture meter, which should read below 20%. Visual clues include cracks in the end grain and a lighter weight compared to fresh wood.
Does this technique work for all types of wood?
Yes, though hardwoods like oak and maple benefit most from aggressive drying since they naturally hold more moisture than softwoods like pine.
How much space do I need between stacked logs?
Leave 2-3 centimeters between pieces to allow proper airflow. This might look less tidy but dramatically improves drying speed.
Should I cover my wood pile completely?
Only cover the top to shed rain while leaving the sides open for air circulation. Full covering traps moisture and slows drying.
Can I speed up the drying process even more?
Adding a small fan for air circulation or stacking in the sunniest, windiest spot on your property can reduce drying time by several weeks.
Is it worth buying a moisture meter?
Absolutely. A basic moisture meter costs around €20-30 and pays for itself quickly by ensuring you’re burning only properly dried wood.