Sarah’s heart sank as she looked out at her back garden last Saturday morning. What had been a satisfying day of autumn pruning the weekend before had left her with a towering pile of branches, hedge clippings, and dead foliage that seemed to mock her from the corner of the lawn. Her car was still recovering from the last trip to the recycling center – bits of bark wedged in the boot, muddy footprints on the seats, and that lingering smell of decomposing leaves.

“There has to be a better way,” she muttered, scrolling through her phone for alternatives. That’s when she stumbled across something that would change everything: a simple garden waste shredder that ordinary people were building in their own garages.
It turns out Sarah wasn’t alone. Across the country, gardeners are discovering a brilliant trick that’s been hiding in plain sight – and it’s saving them countless trips to the tip.

The Weekend Garden Waste Nightmare
Every autumn, the same ritual plays out in millions of gardens. You spend hours carefully pruning shrubs, trimming hedges, and clearing dead plants. For a brief moment, your garden looks pristine and professional. Then reality hits: you’re left staring at what looks like the aftermath of a small tornado.
A typical suburban garden can easily generate 15-20 bin bags of green waste during peak pruning season. That’s not including the leaves that seem to multiply overnight or the surprise branch that snaps during the first winter storm.

“Most people don’t realize they’re spending more time managing garden waste than actually enjoying their garden,” explains landscape designer Marcus Chen, who’s been helping homeowners tackle this problem for over a decade.
The standard solution – loading everything into the car and queuing at the local recycling center – comes with hidden costs that add up fast:

- Fuel costs for multiple trips (average £8-12 per visit)
- Time lost: typically 2-3 hours including loading and waiting
- Vehicle wear: scratches, stains, and that persistent organic smell
- Physical strain from lifting heavy, awkward bags
- Weekend stress from the entire logistical operation
But here’s what’s really frustrating: those branches and leaves aren’t waste at all. They’re packed with nutrients that could be feeding your soil instead of ending up in industrial composting facilities miles away.

The DIY Garden Waste Shredder That’s Changing Everything
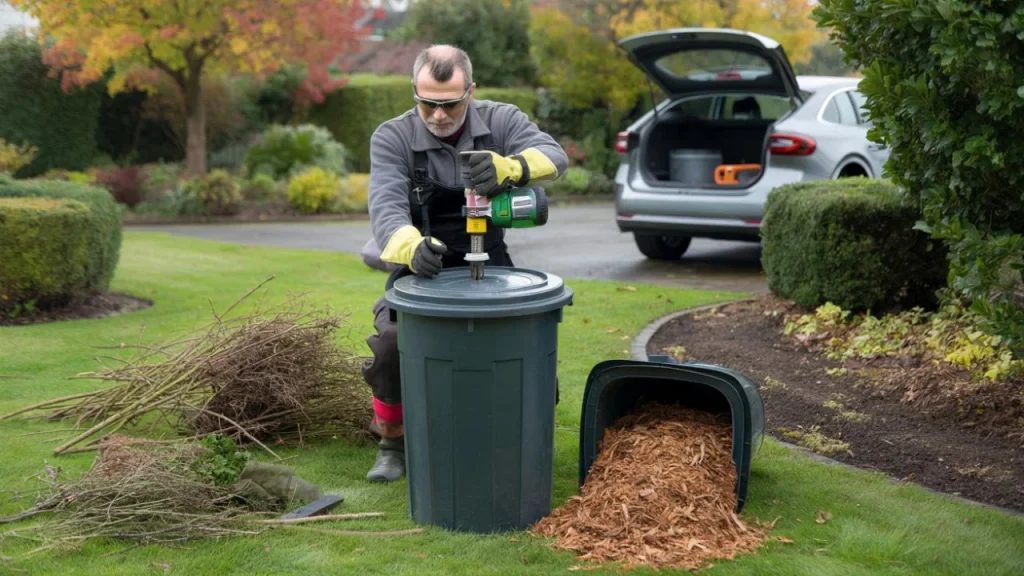
Enter the solution that’s been quietly spreading through gardening communities: a homemade garden waste shredder that costs a fraction of commercial alternatives and works just as effectively.
The concept is beautifully simple. Instead of buying an expensive electric shredder (which can cost £200-800), resourceful gardeners are building their own using everyday items you probably already have or can pick up cheaply.
“I built mine for under £30 using an old wheelie bin and some basic tools,” says retired engineer David Thompson from Surrey. “It’s been running for three years now and has saved me probably 50 trips to the recycling center.”
| Component | Cost | Where to Find |
|---|---|---|
| Large plastic bin (50-80L) | £15-25 | Hardware store or repurpose old one |
| Cutting blades | £8-12 | Old lawnmower blades or metal strips |
| Power drill/motor | £0-40 | Use existing drill or old appliance motor |
| Basic hardware | £5-10 | Bolts, washers, protective guard |
The beauty lies in its flexibility. Soft materials like leaves and small twigs get chopped into perfect mulch. Thicker branches get broken down into manageable chunks that decompose much faster than whole pieces.
Garden consultant Emma Richards has been recommending DIY shredders to her clients for years: “The key is matching the design to your specific garden waste. Someone with lots of hedge clippings needs a different setup than someone dealing mainly with tree prunings.”
Why This Simple Solution Is Spreading Like Wildfire
The homemade garden waste shredder trend isn’t just about saving money – though that’s certainly part of the appeal. It’s solving multiple problems that every gardener faces.
First, there’s the immediate space issue. Shredded material takes up roughly 70% less space than whole branches and leaves. That mountain of green waste suddenly becomes a manageable pile that fits neatly in the corner of your garden.
Second, you’re creating valuable mulch and compost material on the spot. Instead of buying bags of bark chips or leaf mold from the garden center, you’re producing your own from materials that came from your garden in the first place.
“It’s the ultimate closed-loop system,” explains organic gardening expert Lisa Park. “Your garden waste becomes soil food, which grows healthier plants, which eventually become next year’s compost. You’re not losing nutrients to the municipal system.”
The environmental benefits are significant too. Every trip to the recycling center avoided means less fuel burned, fewer vehicle emissions, and reduced strain on waste management infrastructure.
Getting Started: What You Actually Need to Know
The most successful DIY garden waste shredder builds share several key features that make them both effective and safe to operate.
Safety comes first. Any rotating blade system needs proper guards, stable mounting, and clear operating procedures. Most builders recommend starting with softer materials like leaves and thin hedge clippings before tackling thicker branches.
The container needs to be sturdy enough to handle the vibration but large enough to process meaningful quantities. A 60-80 liter bin hits the sweet spot for most household gardens.
- Choose a bin with thick walls and a secure lid
- Position air vents to prevent overheating
- Create easy access points for loading and emptying
- Add wheels or handles for portability
- Include a collection system for processed material
The cutting mechanism can range from repurposed lawnmower blades to custom-cut metal strips. The key is ensuring they’re properly balanced and securely mounted.
“Start simple and upgrade as you learn what works for your specific garden waste,” advises mechanical engineer and weekend gardener Tom Fletcher. “My first version was quite basic, but it taught me what I needed from a more sophisticated design.”
The Real Impact: Time, Money, and Sanity Saved
Gardeners who’ve made the switch report dramatic changes in how they manage their outdoor spaces. Instead of dreading pruning season, they’re actually looking forward to creating fresh mulch for their flowerbeds.
The time savings alone can be transformative. What used to be a half-day expedition to the recycling center becomes a 30-minute processing session in your own garden.
The financial benefits extend beyond avoiding tip runs. Homemade mulch replaces expensive bagged alternatives. Compost materials reduce the need for soil amendments. Some gardeners even find they have excess processed material to share with neighbors or local community gardens.
“I used to spend about £150 a year on trips to dispose of garden waste, plus another £80 on bought mulch and compost,” calculates weekend gardener Janet Miller. “Now I’m producing better quality material than I could buy, and my total costs are basically zero.”
FAQs
Is it legal to build your own garden waste shredder?
Yes, as long as you follow basic safety guidelines and don’t create noise or environmental issues for neighbors.
How much garden waste can a DIY shredder handle?
Most homemade units can process 10-15 bin bags worth of material per hour, depending on the type of waste and motor power.
What’s the biggest safety concern with DIY shredders?
Proper blade guards and secure mounting are essential. Never operate without protective equipment and clear operating procedures.
Can I shred all types of garden waste?
Soft materials like leaves and thin branches work best. Thick woody material may need pre-cutting or a more powerful motor setup.
How long does a homemade garden waste shredder typically last?
With proper maintenance, most DIY units operate effectively for 5-10 years. Blades may need periodic sharpening or replacement.
Do I need special skills to build one?
Basic DIY skills are helpful, but many successful builders are complete beginners. Start with simple designs and learn as you go.