Last Sunday, my neighbor Marie knocked on my door holding a slightly lopsided ramekin. “I’ve ruined another batch,” she sighed, revealing what looked like scrambled eggs swimming in bitter caramel. We’ve all been there – that moment when your homemade crème caramel turns into an expensive disaster instead of the silky, elegant dessert you imagined.
Marie had followed her grandmother’s recipe to the letter, yet something went terribly wrong. The custard curdled, the caramel seized, and her dinner party dessert became a learning experience. But here’s what she didn’t know: there’s one foolproof trick that transforms this notoriously finicky dessert from kitchen nightmare into guaranteed success.
The secret isn’t in exotic ingredients or professional equipment. It’s in understanding exactly how heat, timing, and one crucial caramel technique work together to create that perfect wobbling custard crowned with glossy, bittersweet caramel.

Why Homemade Crème Caramel Breaks So Many Hearts
Crème caramel seems deceptively simple – just eggs, milk, sugar, and vanilla. Yet this humble dessert has humbled countless home cooks who’ve watched their careful work turn into rubbery disappointment or curdled mess.
The problem isn’t the recipe itself. Most traditional formulas work beautifully when executed properly. The issue lies in three critical moments where everything can go sideways: making the caramel, tempering the custard mixture, and controlling the cooking temperature.

“The biggest mistake people make is rushing the caramel,” explains pastry chef Laurent Dubois, who’s been perfecting this dessert for over two decades. “They crank up the heat, the sugar burns instead of caramelizing, and the bitterness ruins everything.”
But there’s hope. Professional chefs have developed a bulletproof method that eliminates guesswork and delivers consistent results every single time.

The Game-Changing Technique Every Home Cook Needs
Here’s the foolproof trick that separates successful homemade crème caramel from kitchen disasters: the water bath method combined with precise caramel timing.
The secret lies in creating your caramel using the “wet method” – starting with sugar and a small amount of water. This approach gives you complete control over the caramelization process and prevents the sugar from burning.

| Traditional Method | Foolproof Method | Key Difference |
|---|---|---|
| Dry sugar in pan | Sugar + 2 tbsp water | Even heating, no hot spots |
| High heat, constant stirring | Medium heat, no stirring | Prevents crystallization |
| Stop at golden color | Stop at amber, add warm water | Perfect bitterness balance |
| Pour immediately | Let cool 30 seconds | Prevents custard cooking |
The essential ingredients remain beautifully simple:
- 500ml whole milk (never low-fat – you need the richness)
- 3 whole eggs plus 3 extra yolks for silkiness
- 80g caster sugar for the custard base
- 100g caster sugar for the caramel
- 1 vanilla pod or 2 tsp pure vanilla extract
- Pinch of sea salt to enhance flavors
“The extra yolks are non-negotiable,” notes culinary instructor Sophie Chen. “They create that luxurious mouthfeel that makes restaurant-quality crème caramel so memorable.”
Step-by-Step Success That Actually Works
Start with the caramel, which sets the foundation for everything else. Combine 100g sugar with 2 tablespoons of water in a heavy-bottomed saucepan. Place over medium heat and resist all urges to stir – swirl the pan gently if needed, but keep that spoon away.
Watch for the color change. The mixture will bubble vigorously as water evaporates, then suddenly quiet down. When it reaches a deep amber color (think maple syrup), remove from heat and immediately add 2 tablespoons of warm water. The mixture will hiss and spit – this is normal.
Divide the caramel between six ramekins, tilting to coat the bottoms evenly. Set aside to cool while you prepare the custard.
For the custard, heat milk gently with split vanilla pod and seeds. Don’t let it boil – tiny bubbles around the edges signal it’s ready. In a separate bowl, whisk eggs, yolks, and remaining sugar until just combined. No need for frothy peaks.
Here comes the crucial moment: tempering. Pour the warm milk in a thin stream into the egg mixture while whisking continuously. This prevents the eggs from scrambling and ensures silky smoothness.
Strain the mixture through fine mesh to remove any lumps, then divide between your caramel-lined ramekins. Place in a roasting tin and pour boiling water halfway up the sides – this water bath is what creates that perfect, gentle cooking environment.
“Temperature control is everything,” emphasizes restaurant owner Michel Roux. “The water bath keeps things gentle and even. No shortcuts here.”
Getting the Texture Absolutely Perfect
Bake at 160°C (320°F) for exactly 35-40 minutes. The custards are ready when they’re just set but still have a gentle wobble in the center when lightly shaken.
Resist the temptation to check too often – opening the oven door repeatedly drops the temperature and extends cooking time unpredictably.
Cool completely at room temperature, then refrigerate for at least 4 hours, preferably overnight. This resting time allows the caramel to soften and create that signature sauce that pools around the unmolded dessert.
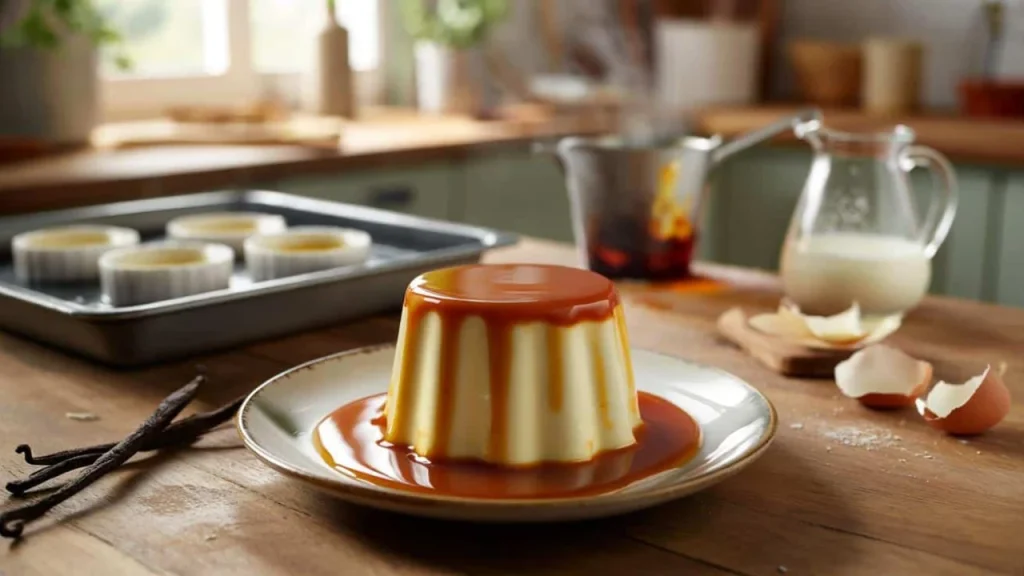
To serve, run a thin knife around the edges, then place a serving plate over the ramekin and flip quickly. The crème caramel should release with a satisfying plop, caramel sauce cascading down the sides.
The payoff is extraordinary: custard so smooth it barely holds its shape, crowned with bitter caramel that cuts through the richness perfectly. Each spoonful delivers that magical contrast between silky sweetness and caramelized depth that makes this dessert a timeless favorite.
FAQs
Why does my homemade crème caramel always curdle?
The milk was too hot when added to the eggs, or the oven temperature was too high, causing the proteins to scramble instead of set gently.
Can I make crème caramel without a water bath?
Not recommended – the water bath provides gentle, even heat that’s essential for smooth texture. Direct oven heat will create rubbery, overcooked custard.
How long can homemade crème caramel be stored?
Up to 3 days in the refrigerator, covered with plastic wrap. The texture actually improves after 24 hours as flavors meld.
What’s the difference between crème caramel and flan?
They’re essentially the same dessert – crème caramel is the French term, while flan is used in Spanish and Latin American cuisine.
Can I use brown sugar instead of white for the caramel?
Stick with white sugar for authentic flavor and color. Brown sugar contains molasses that can make the caramel too intense and dark.
Why is my caramel too bitter?
The sugar was cooked too long past the amber stage. Next time, remove from heat when it reaches maple syrup color, not dark brown.