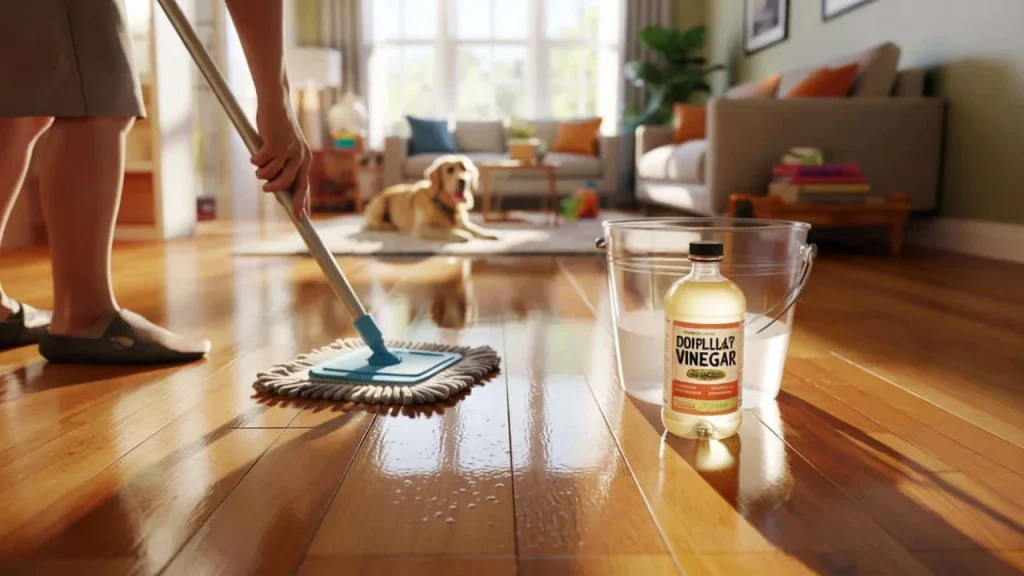
Sarah stared at her hardwood floors in disbelief. After hosting her daughter’s birthday party the weekend before, the once-beautiful oak planks looked like a crime scene of sticky fingerprints, dried juice spills, and mysterious scuff marks. She’d already spent thirty minutes on her hands and knees with expensive wood cleaner, but the floors still looked dull and lifeless.
Her neighbor Linda stopped by to return a borrowed cake pan and immediately noticed Sarah’s frustration. “Oh honey, forget all that fancy stuff,” Linda said, glancing at the array of cleaning products scattered across the kitchen counter. “I’ve got something that’ll make your floors shine like new, and it’s probably sitting in your pantry right now.”
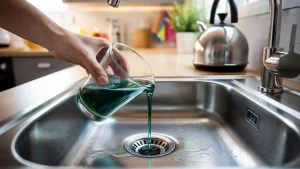
That something turned out to be plain white vinegar – the same bottle Sarah used for salad dressings and pickle recipes. Within an hour, her hardwood floors had transformed from lackluster to luminous, and she finally understood why thousands of homeowners swear by this unexpected pantry hero.
Why This Simple Pantry Item Creates Stunning Hardwood Floor Shine
The secret weapon hiding in your kitchen cabinet is white vinegar, specifically when diluted properly for hardwood floor cleaning. Unlike commercial floor polishes that leave behind residue and buildup over time, vinegar works by gently dissolving the film that makes floors look cloudy and dull.
“Vinegar is naturally acidic, which makes it incredibly effective at cutting through soap residue and mineral deposits that regular mopping leaves behind,” explains Maria Rodriguez, a professional house cleaner with over fifteen years of experience. “Most homeowners are shocked when they see how much brighter their floors look after just one vinegar treatment.”

The magic happens because vinegar removes the invisible layer of grime that accumulates even with regular cleaning. Commercial cleaners often contain oils, waxes, or silicones that promise shine but actually create a film that attracts more dirt over time. Vinegar strips away these layers, revealing the natural beauty of your hardwood underneath.
What makes this approach so appealing is its simplicity. No expensive equipment, no waiting for products to dry, and no complicated multi-step processes. Just mix, mop, and watch your floors transform.

The Complete Guide to Getting Maximum Hardwood Floor Shine
Getting professional-looking results requires following the right technique and proportions. Here’s everything you need to know:
Essential Supply List:
- White vinegar (never use colored or flavored varieties)
- Warm water
- Microfiber mop or well-wrung string mop
- Large bucket for mixing
- Dry microfiber cloth for final buffing
Perfect Vinegar-to-Water Ratios:
| Floor Condition | Vinegar Amount | Water Amount | Best For |
| Light cleaning | 1/4 cup | 1 gallon | Weekly maintenance |
| Medium buildup | 1/2 cup | 1 gallon | Monthly deep clean |
| Heavy residue | 3/4 cup | 1 gallon | First-time treatment |
The step-by-step process is straightforward but crucial for achieving maximum hardwood floor shine. Start by sweeping or vacuuming thoroughly – any loose debris will create streaks when you mop. Mix your vinegar solution in a clean bucket, ensuring the water is warm but not hot, as extreme temperatures can damage some hardwood finishes.
“I always tell my clients to test the solution in an inconspicuous area first,” notes James Chen, a certified flooring contractor. “Most sealed hardwood floors handle vinegar beautifully, but it’s worth taking thirty seconds to be sure.”
Mop in the direction of the wood grain, working in sections about four feet wide. The key is using a damp mop, not a soaking wet one. Too much liquid can seep between boards and cause damage. After mopping each section, immediately follow with a dry microfiber cloth to remove any excess moisture and eliminate streaks.
What Homeowners Are Discovering About This Game-Changing Method
The results speak for themselves. Families across the country are ditching their expensive floor care routines in favor of this simple vinegar approach, and the transformations are remarkable.
Jennifer Martinez from Phoenix discovered the method after her expensive hardwood floors started looking cloudy despite regular professional cleaning. “I was ready to call in specialists to refinish everything,” she says. “One vinegar treatment later, and my floors looked better than the day they were installed. My husband actually asked if I’d hired someone to polish them.”
The financial impact is equally impressive. Where commercial hardwood cleaners can cost $8-15 per bottle and last only a few uses, a gallon of white vinegar costs under $3 and provides months of floor treatments. For families cleaning large hardwood areas regularly, the savings add up quickly.
Beyond the cost benefits, homeowners appreciate the simplicity and safety of vinegar-based cleaning. No harsh chemical odors, no waiting for products to dry, and no concerns about pets or children walking on recently treated floors.
“My two-year-old has a habit of licking everything, including the floor,” laughs Rebecca Thompson from Denver. “With vinegar, I never worry about chemical residue. Plus, my floors have never looked shinier.”
The environmental advantages also matter to many families. Vinegar is biodegradable, comes in recyclable packaging, and eliminates the need for multiple plastic bottles of specialized cleaners. It’s a solution that makes both your floors and your conscience shine.
Common Mistakes That Prevent Perfect Results
While vinegar cleaning is straightforward, several common errors can diminish results or even damage floors. The most frequent mistake is using too strong a concentration – more vinegar doesn’t equal better shine, and overly acidic solutions can dull some finishes over time.
Another common error is skipping the final dry-buff step. This crucial finishing touch removes any remaining moisture and creates the mirror-like surface that makes hardwood floors truly spectacular. Without it, floors may air-dry with streaks or water spots.
Timing matters too. Never let vinegar solution sit on hardwood floors – work in manageable sections and immediately dry each area. Standing water, even diluted vinegar, can penetrate seams and cause swelling or discoloration.
“The biggest mistake I see is people rushing the process,” observes cleaning expert Rodriguez. “Take your time, work systematically, and always finish with that dry cloth. That’s what creates the professional-looking shine.”
FAQs
Is vinegar safe for all types of hardwood floors?
Vinegar works excellently on sealed hardwood floors but should never be used on unsealed, waxed, or oiled wood surfaces. Always test in a small, hidden area first.
How often should I use vinegar to clean my hardwood floors?
For most homes, using a light vinegar solution weekly for maintenance and a stronger solution monthly for deep cleaning provides optimal hardwood floor shine without over-treatment.
Will the vinegar smell linger on my floors?
The vinegar odor dissipates completely as the floors dry, typically within 10-15 minutes. Opening windows or using fans speeds up the process.
Can I add essential oils to make the solution smell better?
While tempting, adding oils can leave residue that attracts dirt and reduces shine. Stick with plain vinegar and water for best results.
What should I do if my floors look streaky after using vinegar?
Streaking usually means the mop was too wet or the final buffing step was skipped. Go over the area again with a clean, damp mop followed immediately by a dry microfiber cloth.
Is this method safe around pets and children?
Yes, diluted vinegar is completely safe once dry. Unlike commercial cleaners, there are no toxic residues or fumes to worry about.